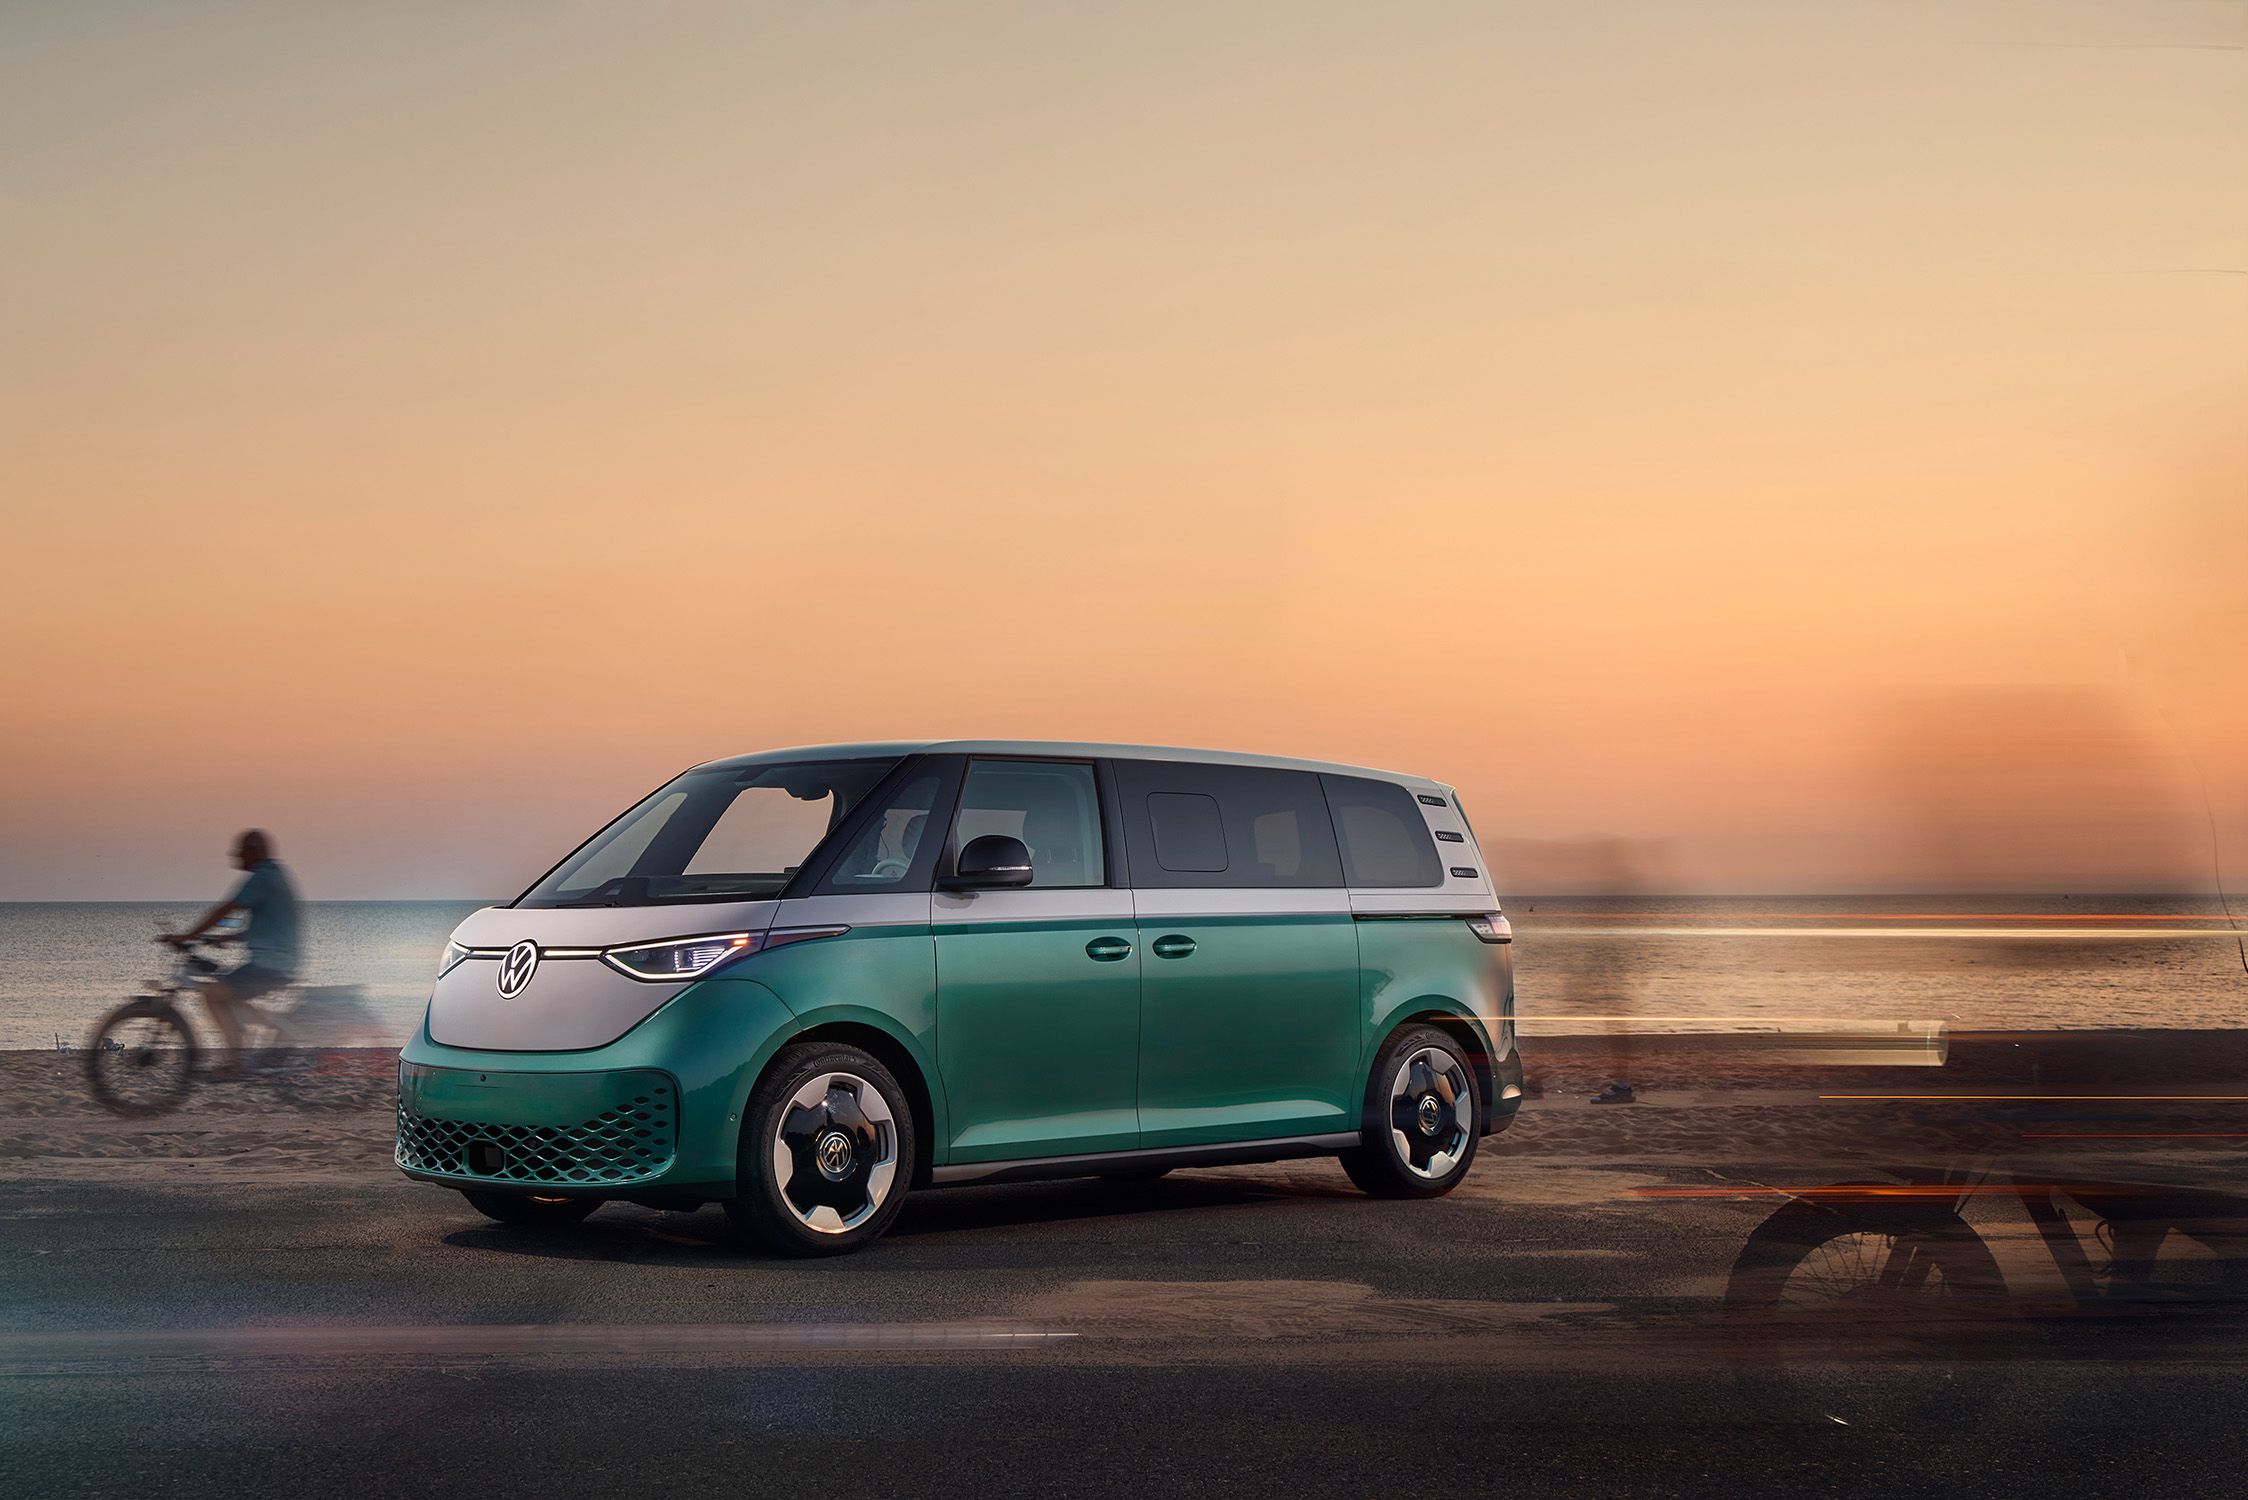
The 2025 VW ID Buzz Electric Bus Gets Protected – Inside and Out
Ceramic Pro Elite West Kansas City recently rolled out the red carpet for a retro-futuristic icon—the 2025 VW ID Buzz electric bus. This modern twist on the legendary VW Microbus got the VIP treatment with a full front Paint Protection Film (PPF) package and all-window Ultimate IR Ceramic Window Film.
Whether it’s shielding the electric marvel’s sleek exterior or enhancing the cabin experience, it’s all about delivering premium durability and performance.
Curious about how we do it at Ceramic Pro Elite West Kansas City? Buckle up because we’re about to walk you through the process of turning this electric eye-catcher into a fully protected, road-ready masterpiece.
About the 2025 VW ID Buzz
The 2025 VW ID Buzz is more than just an EV; it’s a nod to the past wrapped in cutting-edge technology. With its iconic boxy silhouette and unmistakable charm, it’s a tribute to the classic VW Microbus while paving the way for an electric future.

Boasting a spacious cabin, next-gen features, and enough style to turn heads, the ID Buzz is already making waves among electric vehicle enthusiasts and VW loyalists alike.
But a vehicle of this caliber needs more than just good looks—it needs protection. The team at Ceramic Pro Elite West Kansas City understood the assignment.
Explaining Our Process
When it comes to protecting a head-turning vehicle, you don’t just wing it. Our meticulous process ensures every detail is covered for long-lasting protection and pristine aesthetics. Let’s break it down step by step.
With this ID Buzz, the client wanted our team to install paint protection film on the front end – or high strike areas. They also wanted to focus on interior comfort and protection against UV rays – so we installed our Ceramic Pro Ultimate IR window film on the inside of the glass.
Decontamination Wash
Every successful protection job begins with a blank slate. That’s why we initiate every project with a thorough decontamination wash. This step removes all debris, contaminants, and residues from the vehicle’s surface, ensuring we’re working with a perfectly clean canvas.
Whether it’s dirt, industrial fallout, or microscopic particles, nothing gets left behind, saving our pristine bays from contamination during the next steps of the process.
But, it also serves another critical function. Our installation studio is clean-room level. We always ensure that every vehicle that enters our clean room is impeccably clean. This helps to maintain a pristine working environment and reduces cross contamination.
Prepping for PPF Installation
Before we apply the Paint Protection Film, it’s crucial to prepare the vehicle, and we take this prep work seriously. Here’s exactly what goes into it:
- Iron Decontamination
Using a specialty chemical, we eliminate any iron particles clinging to the vehicle’s clear coat—think brake dust, rail particles, or industrial residue. This ensures a clean surface, so the PPF adheres effortlessly.
- Clay Bar Treatment
Once the surface contaminants are mostly gone, we move on to the clay bar treatment. This process leaves the paint silky smooth and perfectly prepped, creating an ideal surface for the PPF’s adhesive to bond.
- Seam Detailing
Seamless installations are our specialty. To get those flawless looks, we clean every single seam on the car, even in those tricky tight spots. Clean seams mean no lifting or bubbling in the future.
- Paint Correction
If the vehicle’s clear coat has imperfections, we typically recommend a single-stage paint correction. While our PPF’s nanotechnology can heal minor surface imperfections, it can’t work miracles. Prepping with a correction ensures perfection.
- Inspection for Paint Chips
Installing PPF over chipped paint? Big mistake. Chips can cause bubbling or adhesive failure, and they don’t look great, either. That’s why we painstakingly inspect for existing chips and, when possible, apply factory-matching touch-up paint before proceeding.
Installing Ultimate IR Window Film
Once the exterior is protected, it’s time to kick things up a notch for the driving experience. For the VW ID Buzz, we applied our Ceramic Pro Ultimate IR Window Film to all windows.
This isn’t your average car tint. The Ultimate IR Window Film goes beyond aesthetics to deliver advanced heat rejection, reduced cabin glare, and UV protection for the ultimate in driving comfort. The cabin stays cooler, the interior stays protected from fading, and the passengers enjoy a more luxurious, peaceful ride.
Whether you’re stuck in rush-hour traffic or cruising down Route 66, this film raises the bar for style and performance.
Explaining Our Window Tint Installation Process
Window Film installation is a precision process. At our Elite Dealer in West Kansas City, we’re known for the quality of our tint – and expert installation. Noted below is the process we take for ALL window film jobs.
Step 1 – Inspect and Clean the Interior
Before installation, we thoroughly clean the interior of your car to ensure a dust-free environment. This helps prevent any contaminants from getting trapped between the film and the glass, resulting in a flawless application. We also inspect for any existing damage or imperfections that may affect the installation process.
Step 2 – Protect the Interior
Installing window film requires generous use of a “slip solution,” essentially a mix of soapy water. This solution allows the film to glide smoothly over the window’s surface, giving the technician the flexibility to position it precisely before securing it in place.
During the tacking process, excess water often spills onto the door panel. To prevent water damage, we take the precaution of applying a protective wrap beforehand, ensuring the process is both effective and safe.
Step 3 – Window Decontamination
Cleaning the exterior of your windows is an essential first step in our window tint installation process, but it doesn’t address the embedded debris on the glass. To guarantee a flawless bond for your ceramic window tint, we perform a meticulous glass detailing process on both the interior and exterior surfaces.
This process involves multiple steps and specialized products, ensuring a pristine finish and optimal adhesion.
Exterior Glass Cleaning
Shrinking is a crucial step in the process of installing window film. By applying heat, the film is carefully shrunk to achieve a precise, custom fit. This step is performed on the outside of the glass where the film will be applied.
To prevent any contamination during the process, we thoroughly clean the exterior surface using specialized cleaning pads and microfiber towels, ensuring it is spotless before the shrinking begins.
Interior Glass Cleaning
To ensure no debris gets trapped between the film and the glass, we thoroughly decontaminate the interior surface as well. This process creates an impeccably clean, flawless surface—perfectly prepared for the installation of ceramic tint.
Step 4 – Computer Cut Window Film
Not all automotive glass is created equal, with each vehicle featuring uniquely shaped windows. To guarantee a precise fit for every window tint installation, we use advanced computer-cut patterns tailored to each vehicle.
These patterns are carefully cut using a plotter, ensuring exceptional accuracy while minimizing film waste. This efficient process not only enhances quality but also helps us keep costs low—savings we’re proud to pass on to our clients.
Step 5 – Window Film Weeding
Computer cutting offers impressive precision, but it’s not always flawless. To achieve a perfect fit, professional window film installers perform a process called “weeding” before applying the film to the glass. This involves carefully removing any excess tint material from the edges and cutouts, ensuring seamless and precise installation.
This process ensures that only the intended sections of the tint remain on the window, much like peeling away the excess parts of a sticker to reveal the desired design. Weeding is essential for achieving a clean, precise finish, ensuring the tint not only looks professional but also functions effectively.
Some window tint installers cut the film directly on the automotive glass. We strongly discourage this practice, as it risks scratching the glass or, even worse, damaging the window trim.
Step 6 – Shrinking
Before applying the tint to the interior of the glass, our technicians carefully use a heat gun to shrink the film. This process ensures the window film fits perfectly, creating a tight, smooth, and flawless finish for a seamless installation.
Step 7 – Tacking the Film
During installation, tinters apply a generous amount of slip solution to position the film precisely on the glass. Once the alignment is perfect, they use a squeegee to secure the film in place. This process removes excess slip solution, activates the adhesive, and ensures a clean, seamless bond between the film and the glass.
Step 8 – Precision Fitting
Some windows have narrow, hard-to-reach areas that demand expert precision for a flawless installation. Our skilled technicians utilize specialized tools to carefully tuck the film into tight corners and crevices. This meticulous process minimizes the risk of tiny bubbles forming during the drying phase, ensuring a smooth and professional finish.
Step 9 – Final Wipe Down & Drying
Once the film installation is complete, our technicians carefully wipe down the entire door and interior sections to remove any residual liquid. The vehicle is then placed in a temperature-controlled environment for several hours, ensuring the adhesive begins to cure properly.
As part of our quality control process, our technicians conduct a thorough final inspection after the initial curing is complete. They carefully check for any imperfections, creases, or bubbles to ensure flawless results before returning the vehicle to our clients.
Explaining the Difference Between Ceramic Tint and Regular Tint
Tint isn’t just tint, and that old, bubbling low-quality tint from yesteryears doesn’t compare to today’s ultra-modern ceramic films. Here’s why our Ceramic Pro Window Film stands out from the crowd:
- Better Heat Rejection
Ceramic tint blocks up to 96% of infrared heat, keeping your cabin cooler than standard tint could even dream of.
- UV Protection
It’s not just about comfort—ceramic tint safeguards against harmful UV rays that can fade your interior and harm your skin. It’s basically sunscreen, but for your car.
- Crystal-Clear Clarity
With ceramic tint, you don’t sacrifice visibility for style. See the road ahead with stunning clarity.
- Long-Lasting Durability
Unlike regular tint that can fade, bubble, or peel over time, ceramic tint is a reliable performer season after season.
Whether it’s for protecting your interior or elevating your vehicle’s sleek appearance, ceramic tint is the gold standard—and it’s exactly what the VW ID Buzz deserves.
Why We’re the Elite Choice
At Ceramic Pro Elite West Kansas City, we take vehicle protection to the next level. From the decontamination wash to the final window tint application, we pride ourselves on our attention to detail and dedication to quality. Your car isn’t just another vehicle in our shop; it’s a canvas, and we aim for perfection every time.
By trusting us, you’ll enjoy advanced protection, professional craftsmanship, and durable results that safeguard your investment and preserve your vehicle’s stunning aesthetics for years to come.
Whether you drive a cutting-edge electric bus like the VW ID Buzz or any other vehicle you want to protect, we’re here to make sure it stays looking—and performing—its best.
Elevate Your Ride with Ceramic Pro Elite West Kansas City
Want to give your vehicle the same VIP treatment as the 2025 VW ID Buzz? Contact Ceramic Pro Elite West Kansas City today to get started on top-tier vehicle protection. From Paint Protection Film to Ceramic Window Tint, we’ve got all your bases covered.


